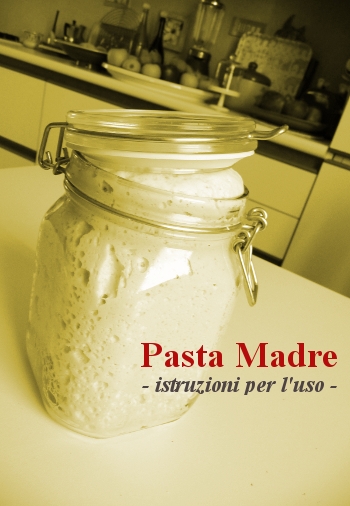
Vi presento la mia Pasta madre, che curo e strapazzo da 5 mesi :-)
Dopo la prima esperienza di panificazione fatta con Chiara & Co. il maggio scorso, e riportatami a casa il mio pezzetto di pasta madre, non ho più smesso di fare il pane!
A cadenza settimanale, prendo dal frigorifero il mio barattolo magico e impasto pani sempre diversi.
E’ un’esperienza meravigliosa!!
E’ bello innanzitutto vedere come il tuo lievito cresce e si moltiplica ad ogni rinfresco, poi affondare le mani nell’impasto e sentire che man mano si trasforma, diventa liscio, si gonfia e sentire infine il profumo di pane che si diffonde in tutta casa durante la cottura…..mmmmmmmm!
Sperando di avervi fatto venire la voglia di provare, ora passo a raccontarvi di come nasce e come cresce la pasta madre. Il mio contributo, non potrà essere ovviamente esaustivo, ma l’intento è quello di raccontarvi la mia esperienza. Inoltre, questo vuole essere anche un luogo di scambio e di confronto tra quanti siano interessati al tema.
Spero, insomma, di riuscire a diffondere nel mio piccolo la cultura del pane fattoincasa in un tempo in cui, per definizione, nessuno ha più tempo!
Eh sì, tempo ce ne vuole, ma ne vale veramente la pena e riuscirci è, come sempre, una questione di testa!!
PASTA MADRE – LA GENESI
![]()
200 gr di farina “0” | 100 gr di acqua tiepida | 1 cucchiaino di miele
Per prima cosa, devo dire che, quella che ci accingiamo a creare, è una pasta madre al 50% di idratazione, questo vuol dire che nella combinazione di farina e acqua, quest’ultima è presente nella misura del 50% rispetto al peso della farina.
Un’altra cosa importante da dire è che la farina riveste un ruolo fondamentale, per cui per favorire il processo di sviluppo dei batteri necessari alla formazione del lievito è preferibile utilizzare farina biologica e possibilmente macinata da non molto tempo. A tale scopo è preferibile acquistare la farina direttamente dal produttore se possibile, ciò non toglie che si raggiungano buoni risultati anche con la farina acquistata al supermercato. La qualità sarà diversa, ma vi renderete conto soltanto con la pratica che tali accorgimenti ad un certo punto saranno fondamentali. Per ora l’importante è cominciare!

1. Pesate 200 gr di farina “0” e metterla in una terrina, aggiungere 100 gr di acqua tiepida non calcarea (a questo proposito sarebbe meglio bollirla prima) e un cucchiaino di miele che aiuta la fermentazione. Con l’aiuto di una forchetta miscelare il composto, quando la farina avrà assorbito l’acqua impastare un pò con le mani e formare una palla.
2. Formare un taglio a croce sulla superficie e riporre in un vaso di vetro coperto con un canovaccio umido. Tenere il barattolo nella dispensa per 48 ore lontano da correnti d’aria e ad una temperatura compresa tra i 18 e i 25 gradi.

3. Trascorse le 48 ore potrete notare che la palla ha raddoppiato il suo volume, si è gonfiata e che si siano formati al suo interno degli alveoli irregolari. Buon segno, la pasta madre si sta formando!

4. Se sulla superficie si sarà formata una crosta, con un cucchiaio bisogna toglierla e buttarla via. A questo punto prendere 200 gr del composto (il resto si butta via) e metterlo in una terrina, aggiungere 100 gr di acqua tiepida e mescolare bene con una forchetta affinchè non ci siano grumi.
5. Aggiungere 200 gr di farina, mescolare prima con la forchetta e poi ancora un pò con le mani. Formare di nuovo una palla, fare sulla superficie un taglio a croce e riporre di nuovo nel barattolo (come descritto sopra) che nel frattempo avrete accuratamente lavato. Coprire con un tovagliolo umido e riporre in dispensa per altre 48 ore.

6. Noterete come con il trascorrere delle ore la pasta madre raddoppi il suo volume, ciò è una bella soddisfazione perchè vuol dire che tutto sta procedendo per il verso giusto e che all’interno del barattolo si stanno formando tutti i batteri buoni che renderanno il nostro lievito attivo. Ma occorre aver pazienza e non avere fretta.
7. Prendete la pasta madre, e se sulla superficie si è formata una crosta, toglierla con un cucchiaio, poi ne pesate 200 gr (il resto si butta via), aggiungete 100 gr di acqua tiepida e 200 gr di farina “0” e ripetere le operazioni descritte ai punti 5 e 6! In pratica rimaniamo sempre con 200 gr di pasta madre alla quale aggiungiamo lo stesso peso di farina (200gr) e la metà del peso di acqua (100 gr). Se non facessimo così ci ritroveremmo a un certo punto ad avere chili e chili di pasta madre e saremmo costretti ad abbandonare la nostra cucina :-)

8. Dalla volta precedente, anche se all’apparenza vi sembra non sia successo niente di importante, potrete notare che la pasta madre comincia a presentare degli alveoli più grandi, ma non è ancora matura . Ve ne accorgete anche dal fatto che è ancora molto appiccicosa e abbastanza liquida.
La pasta madre è da considerarsi matura quando raddoppia il suo volume in 3-4 ore e questo livello si raggiunge dopo un paio di mesi, infatti più la pasta madre è vecchia e più è buona.

9. Ma torniamo a noi! Adesso si procede per altre 7 volte a fare il rinfresco della pasta madre come descritto al punto 7 con una cadenza questa volta giornaliera. Ovvero ogni giorno prelevare dal vostro barattolo 200 gr di pasta madre, aggiungete 100 gr di acqua tiepida e 200 gr di farina “0”, mescolare il tutto, formare la palla, fare un taglio a croce sulla superficie, riporre in un barattolo di vetro, coprire con panno umido, riporre in dispensa…..! Dopodichè la pasta madre potrà essere conservata in frigorifero e dovrà essere rinfrescata almeno 1 volta a settimana.
Con il passare del tempo vi renderete conto che la vostra pasta madre si rafforzerà, diventerà più elastica e l’alveolatura si presenterà più regolare (vedi foto), inoltre il profumo vi dovrebbe ricordare quello dello champagne.
Bene quando capite di essere arrivati a questo risultato si può cominciare a mettere le mani in pasta!!!!!
Ovviamente rimango a disposizione per rispondere alle vostre domande :-)

SOURDOUGH – THE GENESIS
![]()
200 gr of flour “0” | 100 gr warm water | 1 teaspoon of honey
First, I must say that what we are going to create is a Sourdough to 50% hydration, which means that in the combination of flour and water, this last one is equivalent to 50% by weight of flour.
Another important thing to say is that the flour plays a key role, so to facilitate the process of development of bacteria necessary for the formation of yeast is preferable to use organic flour milled not much time before. For this purpose it is better to buy the flour directly from the manufacturer if possible, this does not mean that we Achieve good results even with the flour bought at the supermarket. The quality will be different, but you will realize by practices that ingredients are very very important. But now let’s go!
1. Take 200 grams of flour “0” and put it in a bowl, add 100 grams of warm water non-calcareous (in this regard would be better to boil first) and a teaspoon of honey (it helps the fermentation) . With the help of a fork mix the compound, when the flour has absorbed the water knead a bit with your hands and form a ball.
2. Cut a cross on the surface and place the ball into a glass jar covered with a damp cloth. Keep the jar in the pantry for 48 hours away from drafts and at a temperature between 18 and 25 degrees.

3. After 48 hours you will notice that the ball has doubled its volume was inflated and that are formed inside the irregular bubbles. Good thing, The Sourdough is forming!
4. If on the surface will have formed a crust with a spoon must take off and throw it away. Then take 200 grams of the compound (the rest is thrown away) and put it in a bowl, add 100g of warm water and stir well with a fork untill there are no lumps.
5. Add 200 grams of flour “0”, stirring with a fork first and then again a bit with your hands. Form a ball again, cut on the surface a cross and put again into the jar (as described above) that in the meantime you have thoroughly washed. Cover with a damp cloth and store in the pantry for another 48 hours.

6. You will notice that with the passing of the hours the sourdough doubled in volume, this is a great satisfaction Because it means that everything is going the right way and that inside the jar are forming all the good bacteria that makes active our yeast. But we must have patience and do not want to go fast.
7. Take the sourdough, and if the surface has formed a crust, remove with a spoon, then take 200 grams (the rest is thrown away), add 100 grams of warm water and 200 grams of flour “0” and repeat the steps described in paragraphs 5 and 6! In practice we are always with 200 grams of sourdough to which we add the same weight of flour (200g) and half the weight of water (100 g). If we do not do so we would at some point to have pounds and pounds of sourdough and we would be forced to abandon our kitchen:-)

8. From the previous time, apparently nothing happened, but you may notice that the sourdough begins to present bigger bubbles, but is not yet mature. You can undertad it by the fact that it is still very sticky and quite liquid.
Sourdough is mature when doubled in volume in 3-4 hours and this level is reached after a couple of months, Because most sourdough is old and most are good.

9. But back to us! Now we make the refresh at sourdough as described in paragraph 7, for 7 times, once a day. Take always 200 gr of sourdough, add 100 grams of warm water and 200 grams of flour “0”, mix it all, form the ball, cut a cross on the surface, place into a glass jar, cover with damp cloth, store in the pantry …..! After this, sourdough should be stored in refrigerator, but you must refresh it at least one time per week.
Over time you realize that your sourdough will become more elastic, with large bubbles (see photo), the smell should you also remember that of champagne.
Well, when you realize you have reached this result you can begin to put the hands in dough !!!!!
Obviously I’m available for your questions :-)